EXERCISE

Barbell Glute Bridge

Introduction Image

Introduction


It helps you get stronger and build more muscle in your lower body.


It also improves how well your hips move and how steady you are.


It's good for everyone, from beginners to experienced exercisers.


Doing glute bridges can make you a better athlete and improve how you look.


Here's how to do it right:


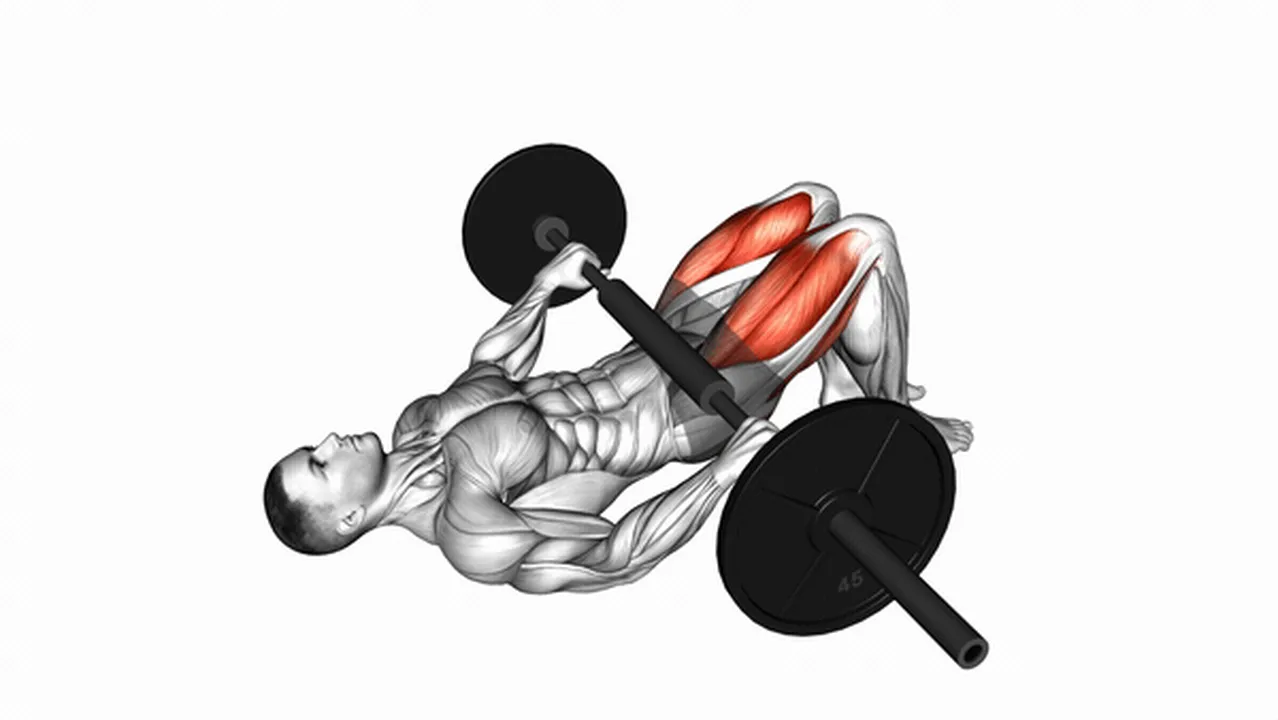
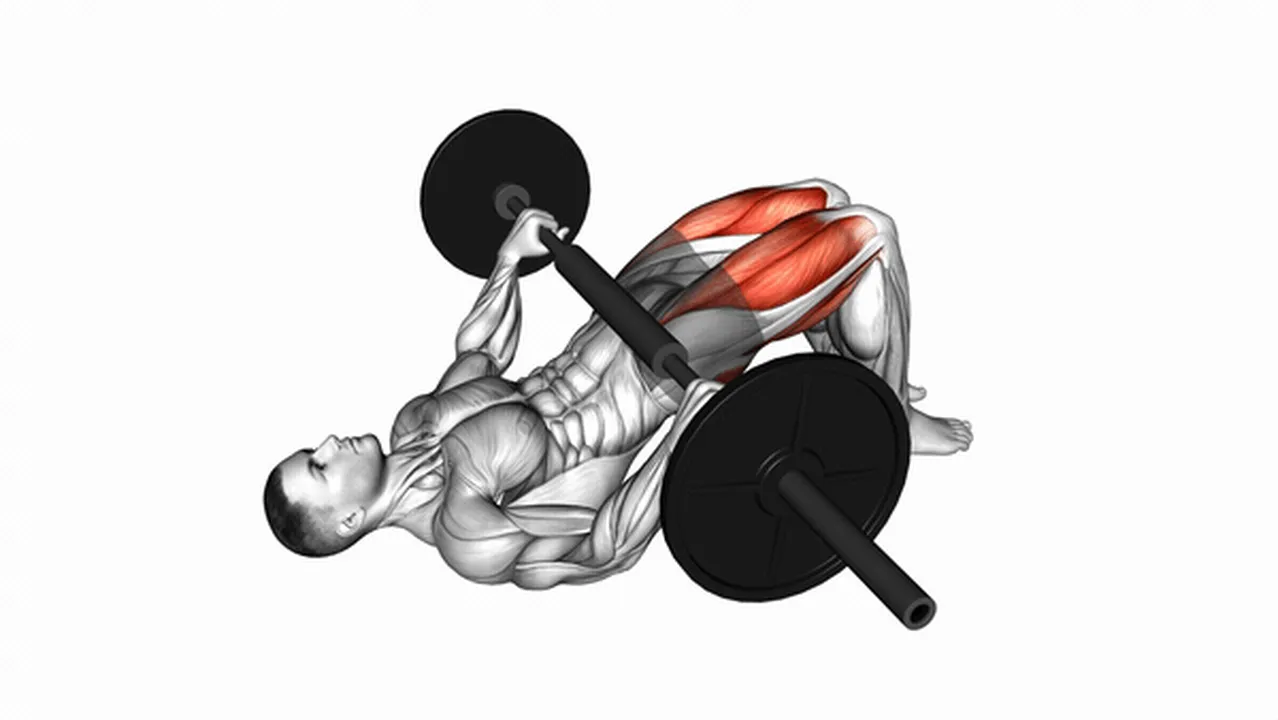
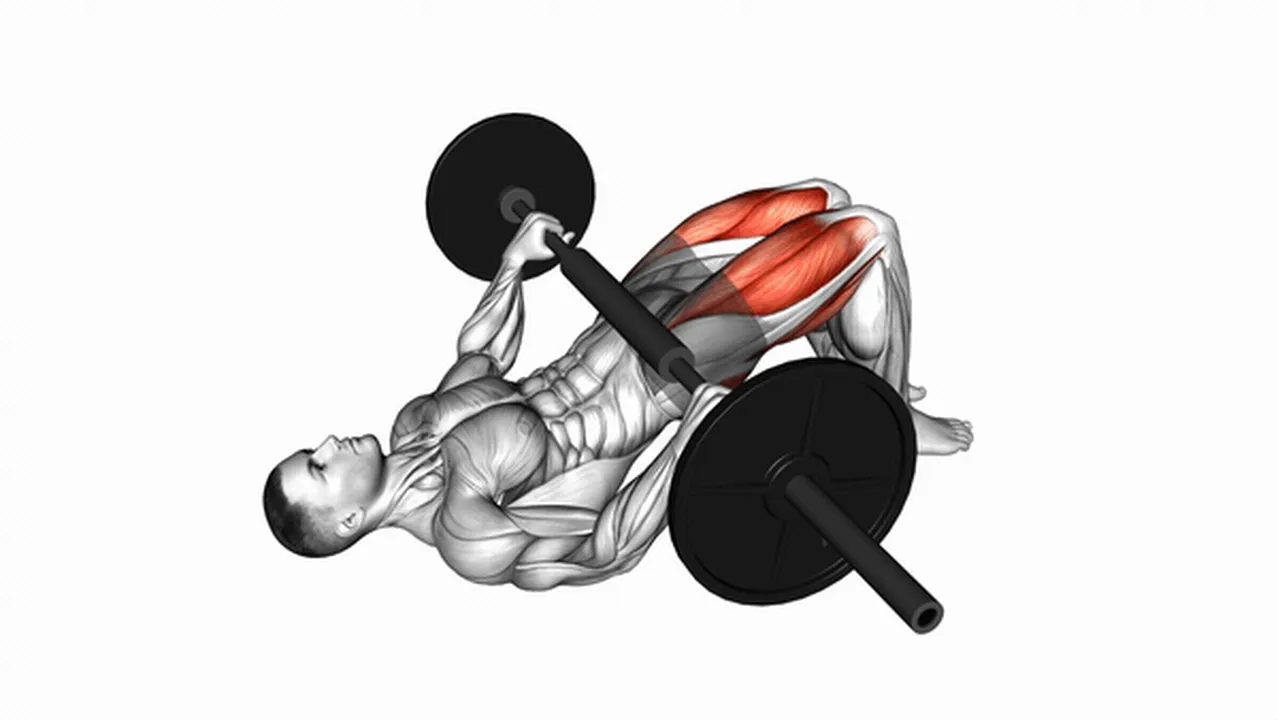
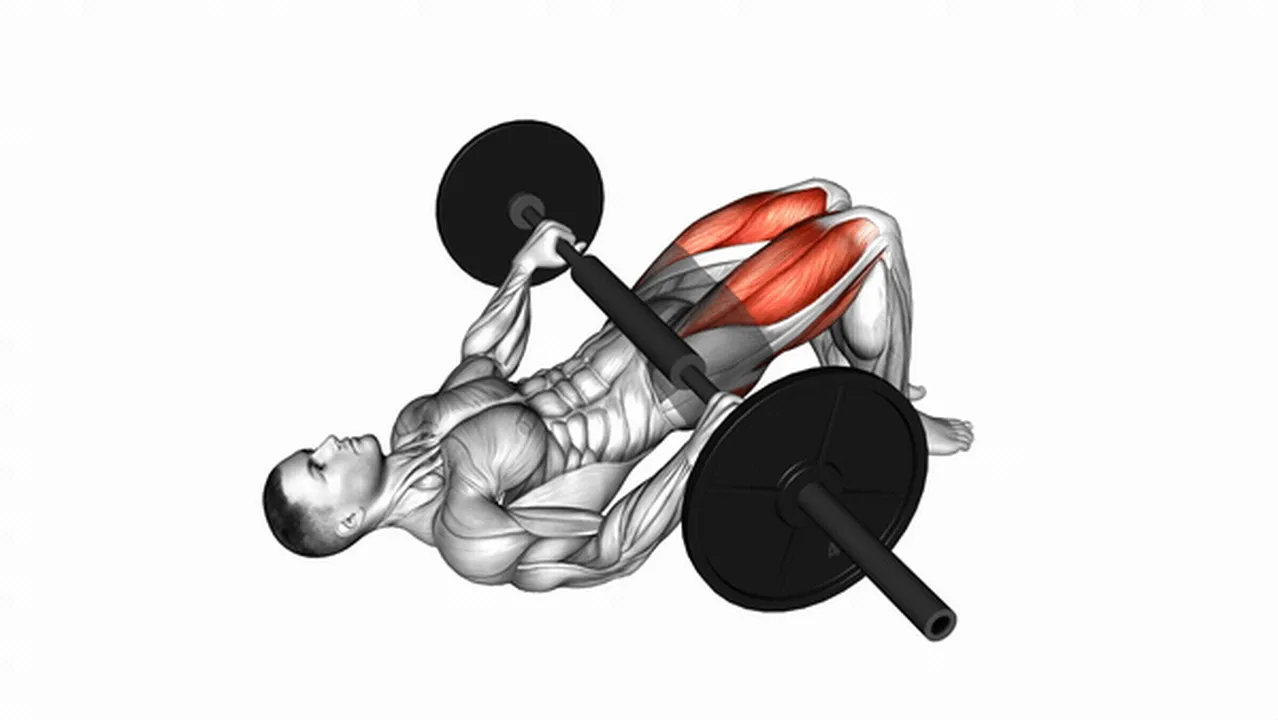
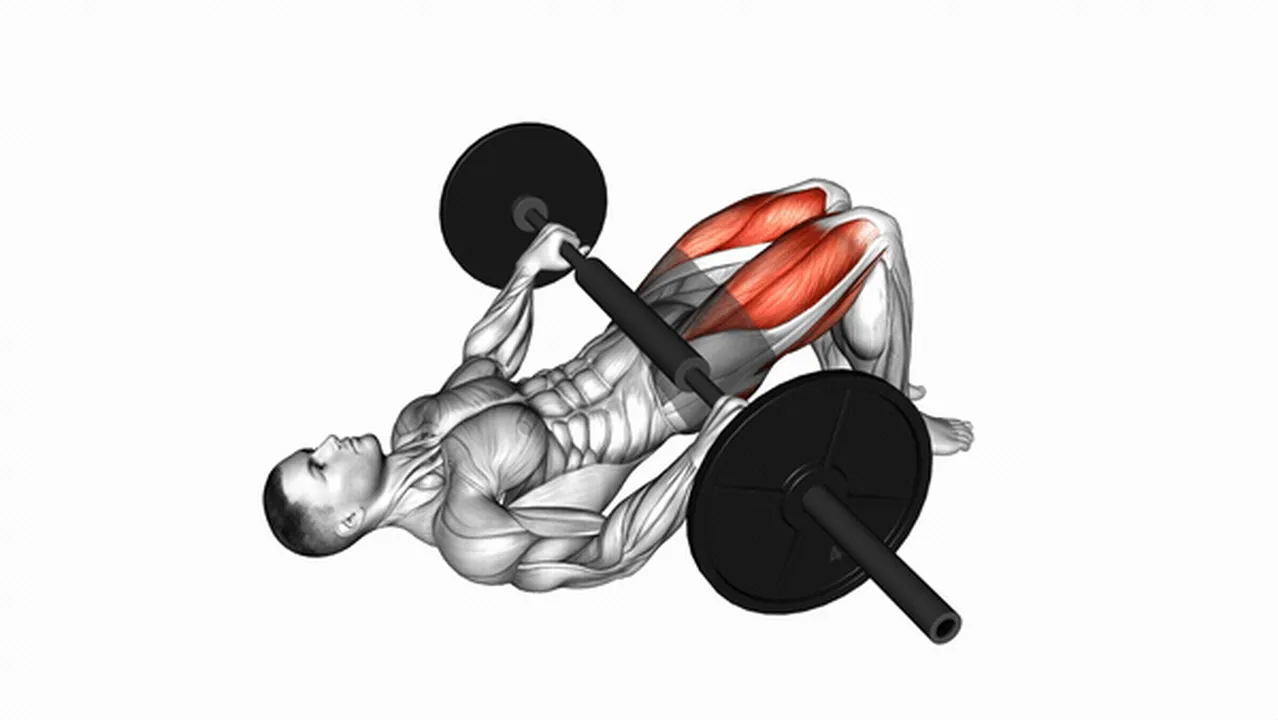
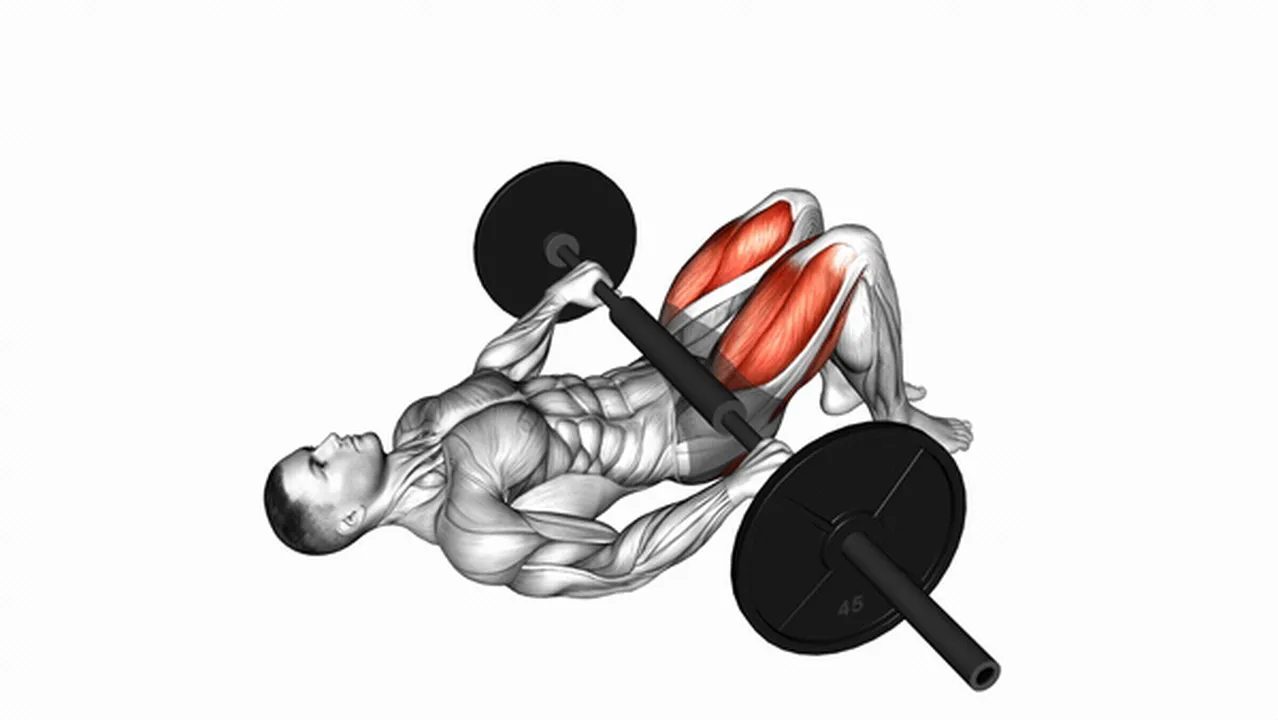
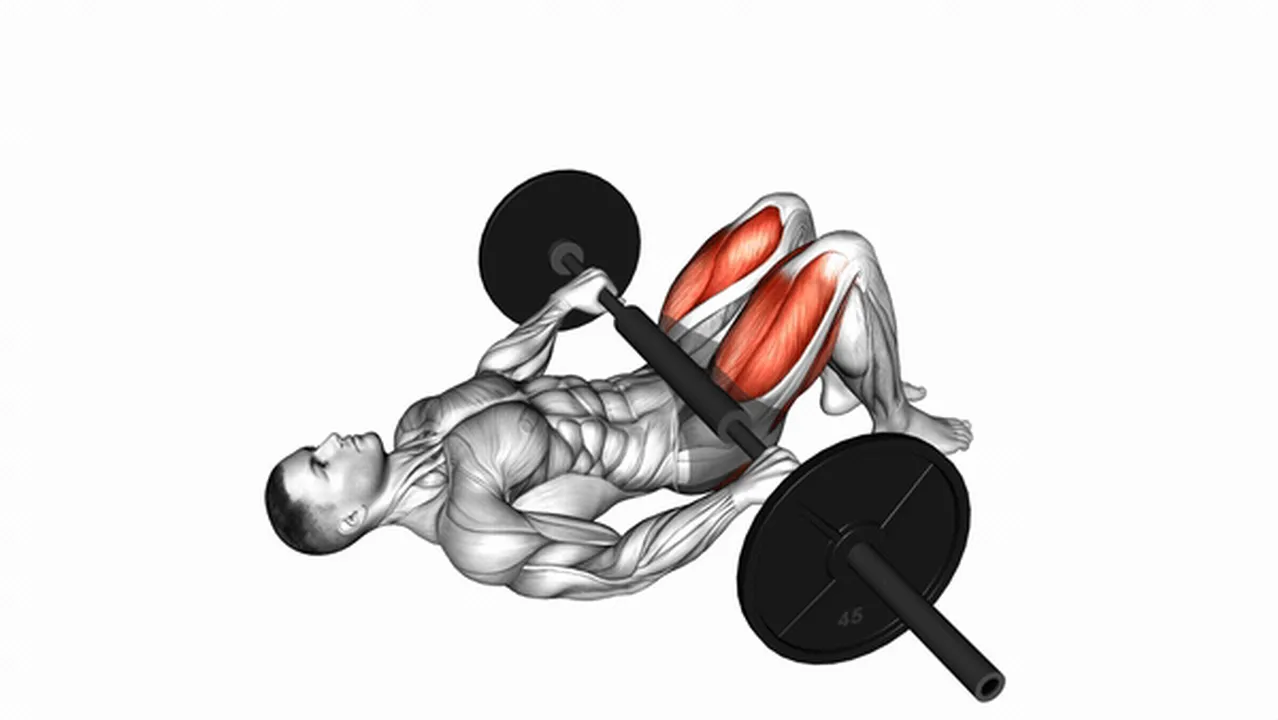
* Lie on your back with your knees bent and feet flat on the floor.


* Place a barbell across your hips, resting it on your hip bones (or use a lighter weight if you're a beginner).


* Push through your heels to lift your hips off the floor, squeezing your glutes at the top.


* Slowly lower your hips back down.


* Repeat for the recommended number of repetitions.


Benefits of doing barbell glute bridges:


* Stronger glutes: These muscles are important for many movements and help with posture.


* Stronger core: A strong core helps with balance and prevents injuries.


* Stronger hamstrings: These muscles in the back of your thighs are also important for many activities.


* Better hip movement: This makes everyday activities and exercise easier.


* Improved stability: This means you're less likely to fall or get hurt.


Variations to try:


* Single-leg glute bridge: This works one leg at a time, making it harder and improving balance.


* Glute bridge with a band: Adding a resistance band around your thighs makes the exercise more challenging.


* Hip thrusts: Similar to a glute bridge, but done on a bench, allowing for a greater range of motion.


Common mistakes to avoid:


* Arching your back too much: This can hurt your lower back. Keep your back straight.


* Not squeezing your glutes at the top: This reduces the effectiveness of the exercise. Focus on squeezing.


* Going too fast: Control the movement to get the most benefit and avoid injury. Move slowly and steadily.


* Using too much weight: Start with a weight you can control. It's better to use less weight and do it correctly.


What are the benefits of the Barbell Glute Bridge? Image

What are the benefits of the Barbell Glute Bridge?


It makes your glutes stronger. The gluteus maximus muscle, your biggest butt muscle, gets a really good workout, leading to bigger and stronger glutes.


It helps your hips move better. This exercise improves hip mobility, making everyday movements easier and more efficient.


It strengthens your core muscles. Your core muscles work hard to keep you stable during the exercise, improving your overall core strength and stability.


It can help prevent injuries. Strong glutes and a strong core protect your body from injuries during sports or other activities.


It improves athletic performance. Stronger glutes are essential for powerful movements in many sports and exercises, like jumping and sprinting.


How to do the Barbell Glute Bridge? Image

How to do the Barbell Glute Bridge?


Hold Tight: Grab the barbell with both hands, making sure your grip is secure. This helps keep the bar stable during the exercise.


Lift Up: Push through your heels and squeeze your buttock muscles to lift your hips off the floor. Imagine you're trying to lift something heavy with your bottom.


Top Position: Raise your hips until your body forms a straight line from your shoulders to your knees. Hold this position for a moment, squeezing your glutes hard at the top. This is the strongest part of the movement.


Come Down: Slowly lower your hips back down to the starting position, keeping your back flat on the floor. Don't let your lower back arch or bend.


Neck and Chin: Keep your chin tucked slightly towards your chest and your neck relaxed. This protects your neck from strain during the exercise.


Common Barbell Glute Bridge variations Image

Common Barbell Glute Bridge variations


Resistance Band Glute Bridge: This exercise uses a resistance band to make a regular glute bridge harder. The added resistance helps you build stronger glutes and improves your posture and balance. It's great for all fitness levels.


How it works: You lie on your back with a band around your thighs, then lift your hips off the floor. The band adds extra resistance as you lift, making your glutes work harder.


Resistance Band Clamshells: This exercise focuses on a specific glute muscle (the gluteus medius) which is important for keeping your hips stable. Stronger hip muscles mean better balance and less chance of injury.


How it works: Lie on your side with a band around your thighs. Keep your feet together and lift your top knee upwards, focusing on squeezing your glutes.


Key Differences: Both exercises use resistance bands, but they work your glutes in slightly different ways. The glute bridge works more of your glutes overall, while clamshells focus on one specific part.


Benefits: Both exercises are good for building strong glutes, improving hip stability, and reducing injury risk. Choose the one that best suits your needs and fitness level.


Alternatives to Barbell Glute Bridge Image

Alternatives to Barbell Glute Bridge


Resistance Band Glute Bridge: Adding a resistance band around your thighs while doing a glute bridge makes your glutes work harder. This helps you build stronger glutes and improves your posture. It's good for everyone, no matter your fitness level.


Pelvic Tilt into Bridge: This starts with a simple pelvic tilt (tilting your hips). Then, you slowly move into a glute bridge. This is good for beginners because it helps you learn the right way to do a glute bridge and strengthens your core muscles (stomach and back).


Rear Decline Bridge: This uses a special bench that's tilted downwards. Doing a glute bridge on this bench challenges your glutes and core in a new way. It's more challenging than a regular glute bridge.


Trying different glute bridge variations keeps your workouts fun and helps you find what works best for your body. Each one focuses on different muscles and skills, so you can build a well-rounded workout.


Common mistakes during Barbell Glute Bridge Image

Common mistakes during Barbell Glute Bridge


Use your glutes, not your arms, to lift the weight. Your arms are just there to hold the bar; the power should come from your bottom. Focus on squeezing your glutes at the top of the movement.


Make sure you're moving your hips through their full range of motion. Don't stop halfway or go too low. Go down until your hips are just above the floor and then squeeze your glutes to lift back up.


Place your feet correctly for best results. Experiment with different foot positions until you find the spot that makes your glutes work the hardest. Generally, hip-width apart is a good starting point. If you feel it more in your hamstrings, move your feet closer together. If you feel it more in your lower back, move them slightly further apart.


Takeaway Image

Takeaway


This exercise targets your glutes, the large muscles in your buttocks, making them stronger and more defined.


Stronger glutes improve your lower body strength and stability, helping with everyday activities like walking, climbing stairs, and even jumping.


Proper form is key to getting the most out of this exercise and avoiding injury. Lie on your back with your feet flat on the floor, knees bent, and a barbell resting across your hips.


To start, squeeze your glutes and lift your hips off the floor, keeping your body in a straight line from your shoulders to your knees. Your core should be engaged to help stabilize your body.


Slowly lower your hips back down to the starting position, keeping control of the movement. Don't just drop your hips.


Repeat this lifting and lowering movement for the recommended number of repetitions and sets, based on your fitness level. Start with fewer repetitions if you're new to the exercise.


Avoid arching your back excessively. This can put strain on your lower back. Keep your core engaged to maintain a neutral spine.


Don't lift the barbell too high. Focus on the glute squeeze, not on how high you can lift your hips. The movement should come from your glutes, not your lower back.


Listen to your body. If you feel pain, stop the exercise and check your form. Pain is a sign that something is not right.


Disclaimer: The routines and schedules featured on our website are for informational purposes only and do not constitute medical or professional advice. Individual preferences, goals, and daily routines may vary significantly. Please note that some product links within our content are affiliate links. While not all routines have been explicitly endorsed by the individuals mentioned, we strive to ensure the accuracy and timeliness of the information we provide.

Disclaimer: BalancedRoutine(BR) does not provide medical advice, diagnosis, or treatment. Any information published on this website or by this brand is not intended as a replacement for medical advice. Always consult a qualified health or mental health professional with any questions or concerns about your mental health.